Sunday, May 25, 2014

DIY Shopping Bag Wall Art


I haven't had time to post lately, unfortunately...I've been busy with graduation and senior activities. Speaking of, I'm so glad summer's finally here for me and I get to relax and hang out with friends. I'm also thinking about dorm decorations for next year, which brings me to today's DIY. I used an old paper shopping bag to make some cool modern wall art. The bag I used was from the Guggenheim Museum in New York City. I am a fan of Frank Lloyd Wright's works, and I love art museums, so this was a great way to commemorate my time there.

All you need is a cool shopping bag you like, from a vacation or destination, or that simply symbolizes memories you have. Cut it to fit the frame (I used a 8x10 frame), and stick it in. I like the sleek black poster frame for this project.


And there you go! Some cool wall art to spruce up your living space. :)

Saturday, May 17, 2014

DIY Wired Headband

I originally got the idea and tutorial for a wired headband here.
What is it with me and headbands lately? This DIY, however, is not a floral headband for once! It is really easy to make if you have a sewing machine, but unfortunately I don't and ended up spending an hour or two on it. I think it was still worth it though! It looks super cute:


Now pick a cute fabric and get started!

Monday, May 5, 2014

DIY Spring Headband (Part 2)

I loved the last headband tutorial so much that I couldn't stop making floral headbands with all my extra fake flowers from past projects. Here is another variation of a floral headband, using smaller and more flowers.


Use flowers like these, that are more abundant per stem and smaller.


Pull the flowers off the stem.


Cut most of the stem off so all that's remaining is the part that attaches the flowers to the stem.


Hot glue the main stem to the top of the headband with a line of glue.


Hot glue the smaller stems coming out of the main stem so that the flowers are all in line with each other.


Continue doing this until there is only about an inch and a half remaining on each end of the headband.

Now you have a beautiful flower crown!


Love, Sam

Friday, May 2, 2014

DIY Spring Headband

As spring progresses, I feel the need to wear florals and bright colors. Here's a DIY for a headband that will spruce up your outfits for the season! I stopped by the Dollar Tree and got materials for this super cheap and easy-to-make spring headband. All you need is:

- Fake flowers (can be bought at the Dollar Tree)
- Headbands (also can be bought at the Dollar Tree)
- Ribbon (ditto)
- Hot glue & gun
- Scissors

Pull the flower off its stem, and take the spiky green plastic part off too.


Glue the fabric flower securely to the rest of the stem, since this is what keeps the flower together.


Cut most of the stem off, then hot glue it to the headband.


Glue another flower on, then glue ribbon to secure the flowers in place.


Wear it outside!


Hope you enjoy this quick DIY.

Tuesday, April 29, 2014

School Art Show

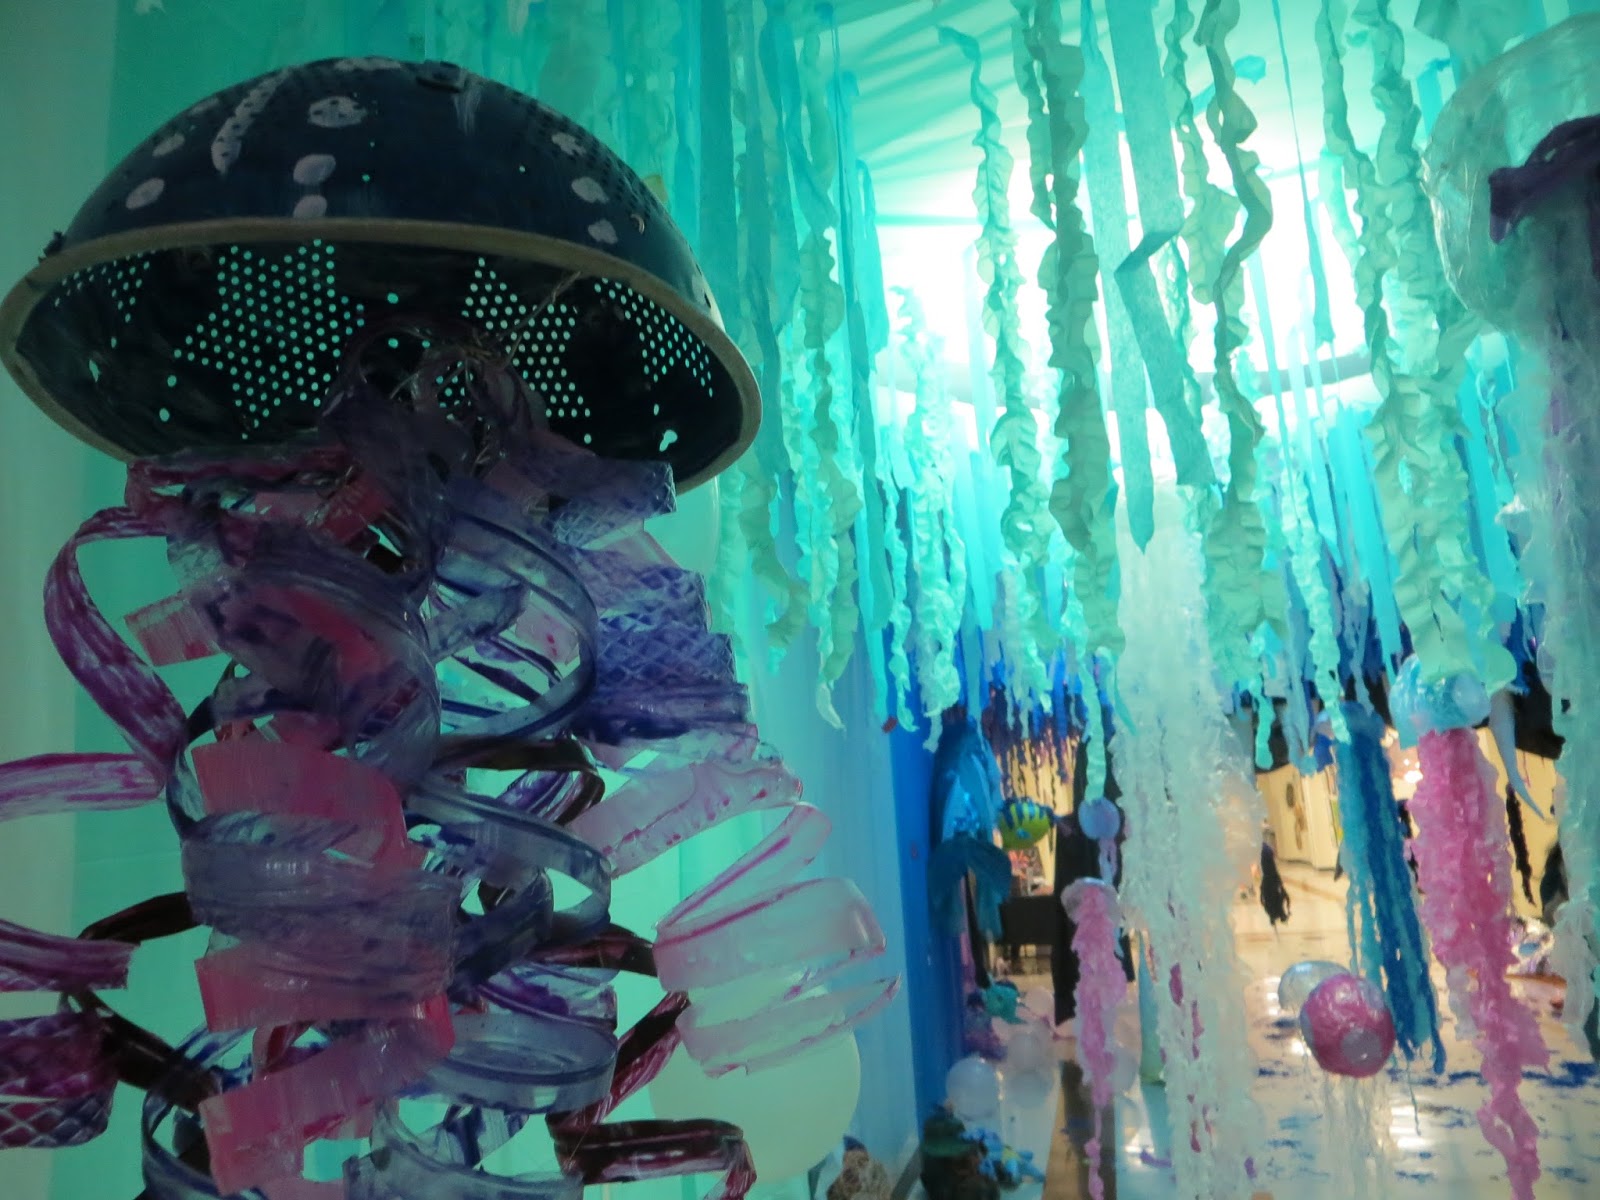
On Sunday, we had our first annual art show at our high school. For two hours, the halls of my school were transformed into a deep-sea environment leading to walls filled with artwork. I am proud to have had art displayed in it, and hope that the students of my school continue to be able to see the amazing art their peers make.


Take some time to enjoy art once in awhile :)

Monday, April 21, 2014

Last year, we planted some daffodils in our front yard near the sidewalk. I'm glad to see that they finally bloomed! 


What I'm not so glad about is these pear trees, which collect so much pollen and make my allergies worse! They are beautiful nonetheless.


On a random note, I found a new favorite snack: dried carrots! I found them at my local organic and fresh produce market that carries a huge variety of unique healthy snacks. They even have peanut butter dispensers that customers can get peanut butter from.


Enjoy this weather!

Thursday, April 17, 2014

Personalized Glass Mug

I've always loved the idea of drinking out of a mason jar. It just seems so much cooler than using a plastic water bottle. Although, I do know that it is much less practical since they break so easily. I found a mason jar with a handle at the craft store, and immediately thought about all the yogurt parfaits and fruit drinks I could put into it. Here's a cute way to personalize your mason jar:


Simply take out the metal circle piece from the lid and trace that circle on a piece of scrapbooking paper. Then draw your first initial letter (or anything else) onto another piece of patterned paper. Cut these shapes out. Glue the initial to the circle and "laminate" with packing tape on both sides. Cut the tape so there is a small circle border around the shape. Then, simply insert the circle on top of the metal circle and place inside the lid. Screw the lid on to make the paper keep its shape.


Store fruit or a parfait to go!