Thursday, April 10, 2014

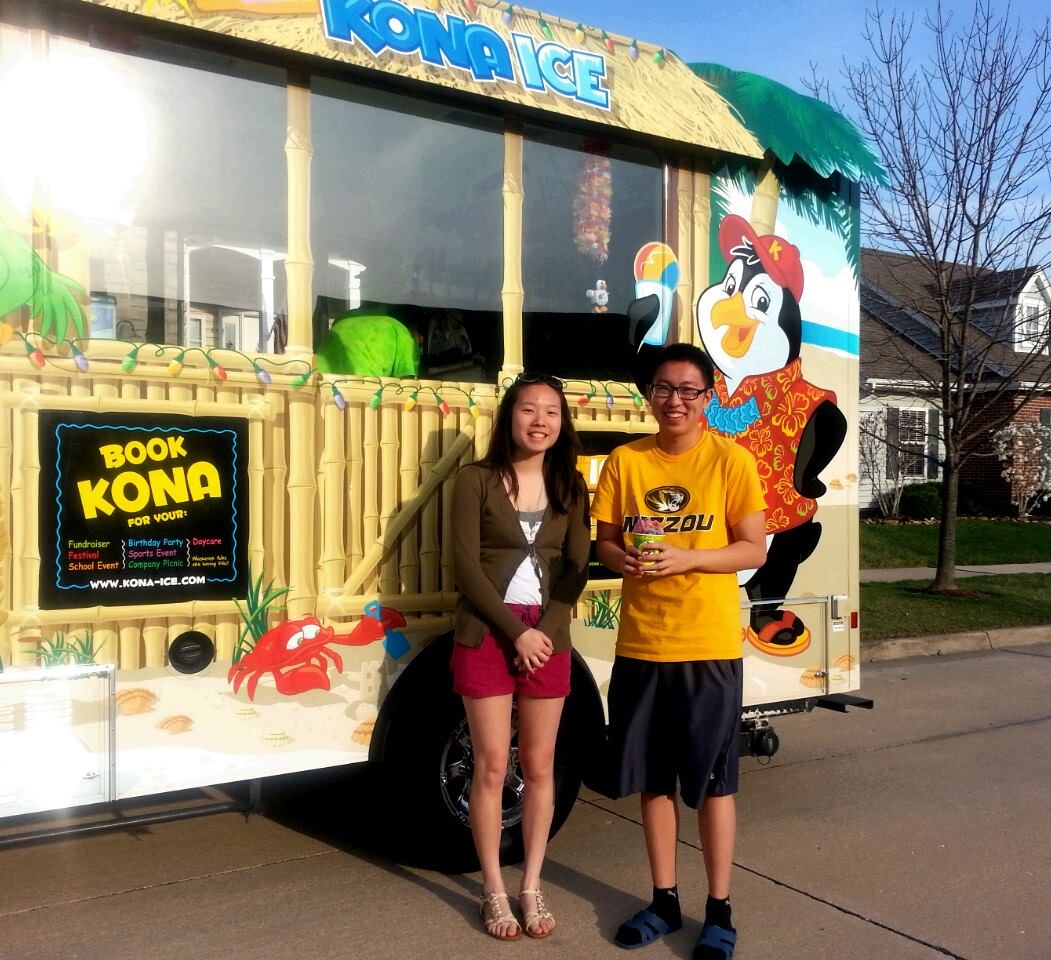
Snow Cones for Spring

...Wow, that was a great unexpected alliteration. Anyway, it was a great nostalgic moment when my friend and I saw a snow cone truck pulled up on the side of a neighborhood road. We instantly stopped the car and ran out to see what they were selling. It turns out, they were selling snow cones and you got to pick your own flavors to put onto the ice! The owners of the truck were extremely nice as well.

What a great way to enjoy this 70-degree weather!


Sunday, April 6, 2014

DIY Spring Tank from Old T-Shirt

With spring here (or coming and going in intervals), I've been starting to think about more summery and hot weather outfits to wear. Recently, I've bought a circle skirt, maxi dress, and spring shirts to wear. But as always, I still have a ton of old t-shirts that I'm not particularly eager to wear. That's why I've been researching ways to refashion old shirts into more attractive spring/summer clothes. Here's an idea for turning an old t-shirt into a tank!


Simply find an old t-shirt with a design you don't mind wearing, and cut off parts of the collar, sleeves, and bottom hem.

I achieved the final product through a lot of trial and error, and you may have to do that too since everyone's body shape is different and different cuts may look good on different people. 

Thursday, April 3, 2014

Barbeque Pulled Pork Avocado Sandwich

I think I'm becoming an expert at sandwich-making. :)
I present to you...my recipe for a Barbeque Pulled Pork Sandwich with avocado in it (of course!).


1. Slice some avocado the long way.


2. In a small pan, drizzle some olive oil and heat it up. Place a slice of bread in the pan and let cook until it is brown (to your taste). Repeat with the next slice.
3. When cooking the second slice of bread, stack pulled pork on it, then layer avocado slices on top.


4. Drizzle some barbeque sauce on top.


5. When ready to serve, place the other slice of bread on top and enjoy!


Delicious!

Monday, March 31, 2014

Spring Break in St. Louis

I just finished Spring Break, and I had the pleasure of making a four-day trip to St. Louis, Missouri. I got to go to so many great restaurants and iconic locations. The only bad thing? The weather felt like fall in St. Louis!

We went to a restaurant called Bailey's Range, where I tried my first bison burger. I didn't know such a thing existed, but I'm always up for trying new food. To my untrained taste buds, the bison burger tasted very similar to a normal beef patty. It was delicious! Bailey's Range also makes homemade milkshakes and ice cream (I got coconut crunch ice cream) and carries a whole page full of sodas that I had never seen before.

Below: "Smoke bomb" burger with bison patty


I'm also excited that I got to see Walk the Moon! They played a great outdoor concert.


An awesomely nerdy (yet not really nerdy) restaurant we went to was called Pi Pizza. Everything was decked out in Pi and the pizzas were named after areas in St. Louis. They toppings were gourmet and the combinations very unique.

Friday, March 28, 2014

Twisted Ponytail Tutorial

Hi guys! Today I'm going to try something new--a hair tutorial! I usually don't have time to do my hair in any fancy way in the mornings, but I do love experimenting when I do have the time. Here's a tutorial for a twisted ponytail. A lot of people know another way to achieve a similar effect--tying your hair then flipping the ponytail into itself--but I think this way looks a lot better and is easier to keep. 


First, tie two strands of hair from the sides of your head together.

Next, take adjacent strands of hair from the sides of your head and tuck them into the small ponytail you just made. Make sure the new strands aren't sticking together--in other words, loosen those strands of hair. This creates the "twist" look.

Finally, create the ponytail! Tie the rest of your loose hair together, leaving a few loose strands on the sides. Finish the look off with a cute bow (I used an elastic I DIY'd awhile ago).

Here's what it looks like from the side


Enjoy this easy hair tutorial for casual events! And let me know if you want more hair tutorials :)

Tuesday, March 25, 2014

Day 5 of FSR: Cake Mix Cookies


Did you know that you could make cookies from cake mix? It seems like a relatively simple idea, yet it never crossed my mind. Here's a simple recipe shared by my friend Rayna for easy cake mix cookies.
Rayna is a talented musician and a jack-of-all-trades. She's marching band drum major, she plays four instruments, she knows how to juggle, and she can even sing! And being her friend means that she'll invite me to the school musical that she's playing pit orchestra for (we go to different schools) and I get to brag about her. I'm so lucky :) She's lots of fun to hang out with too, and we always have a good laugh.

Rayna says of this recipe: "I LOVE this cookie recipe! And it's super easy because you use cake mix." Here it is!


Ingredients (to make 12 cookies)
1/4 cup unsalted butter (half stick), softened
1 large egg
1 tsp vanilla extract
1 cup + 1/8 cup any flavor cake mix (about 9 ounces, or half of an 18.25 ounce box of boxed cake mix)
Directions
1. Mix the softened butter, vanilla extract, and egg together with electric beater or by hand.
2. Add cake mix! If the mixture seems too watery, continue adding cake mix in increments.
3. If possible, chill the mixture in the refrigerator for 15-20 minutes to lessen the amount the mixture spreads in the oven.
4. Spoon the mixture in teaspoonfuls onto a parchment paper-lined pan.
5. Cook the pan for 8-10 minutes at 350°F. Do not overbake! These should be super soft.


Mix it up with this new way to do cookies!

...And that's the end of Friends Share Recipes, folks. I hope you enjoyed these amazing recipes as much as I did :)

Monday, March 24, 2014

Day 4 of FSR: Buttered Cream Cheese Roll


Today's recipe is very unique. It's something my friend Jimmy completely made up and I wasn't sure if it would taste good. But when he made it for me, I was surprised that it actually did taste good...I guess I shouldn't have doubted his skills, since Jimmy is a great cook and dreams of opening his own restaurant when he gets older.
Jimmy is sweet, funny, and has great taste in music. :) We've been best friends for many years, and he's one of the only people I feel like I completely "click" with. He loves gaming, reviewing movies, and cooking. Here's his awesome recipe!

Ingredients (to make two rolls)
Two slices of bread
Sugar
Cinnamon
Water
Cream cheese (regular or flavored--I prefer strawberry-flavored cream cheese for this!)
Butter

Directions
1. Toast the two slices of bread.
2. Spread cream cheese on the slices of toast. Don't skimp on this part!
3. Sprinkle cinnamon onto the cream cheese.
4. Carefully roll up the toast tightly.
5. Drop a pat of butter into a cooking pan and let it melt.
6. Place the rolls into the pan and let cook, flipping once in a while.
7. While the rolls are cooking, make a thick glaze comprised of sugar, melted butter, and water.
8. When rolls are lightly browned, take them out and serve with glaze drizzled on top.


Enjoy this unique pastry treat!